Step 1: Planning the Layout
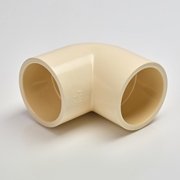
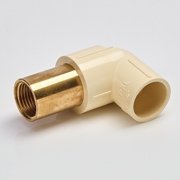
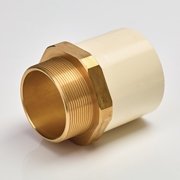
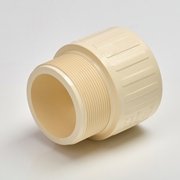
Prior to starting any installation, plan out the complete piping layout meticulously. Determine where water supply enters and exits, where equipment such as water heaters or tanks are placed, and where bends, tees, or elbows are needed. An elaborate plan minimizes unnecessary joints and optimizes flow. At this stage, calculate the lengths of pipes needed and make decisions on suitable fitting types such as couplings, elbows, or reducers.
Make sure the layout complies with building codes, space restrictions, and pressure ratings. Note the thermal expansion characteristics of CPVC — provide for expansion loops or offsets in long, straight pipe runs. Planning should also allow for future maintenance accessibility and efficient installation.
Step 2: Cutting the Pipe
After the layout is complete, the next thing is to cut the pipe to the required lengths. Employ a fine-toothed saw or a CPVC pipe cutter to make straight and clean cuts at a 90-degree angle. Care should be taken to avoid angled or rough cuts since they may result in improper joint fitting or leaks.
Make sure the pipe is well supported while cutting to prevent it from cracking or splintering. Wearing protective gloves and goggles is always recommended to stay safe while cutting. Precise cutting also minimizes wastage of material and makes installation smoother.
Step 3: Deburring and Chamfering
Once the pipe is cut, there will be burrs or sharp pieces at the edges that may obstruct the joining or result in interior friction when water is flowing. Remove these burrs from the inner and outer edges of the pipe using a deburring tool, utility knife, or sandpaper.
Chamfering is the beveling of the outside of the pipe end at a 10° to 15° angle. Chamfering facilitates easier insertion into the fitting and provides a smooth flow of solvent cement. Chamfering avoids pushing the pipe to force the solvent cement to the bottom of the socket fitting, causing weak joints.
Step 4: Dry Fitting (Trial Assembly)
It is advisable to dry-fit the pipe and fittings together without any adhesive before using solvent cement. This helps ensure that the pipe fits well into the fitting and that the directions and angles are proper.
Dry fitting also provides an opportunity to check measurements and double-check the layout. Push the pipe into the fitting socket all the way and pencil mark the pipe and fitting for future alignment during solvent welding. This will preserve orientation and minimize the likelihood of mistakes.
Step 5: Cleaning the Surface
Both the outer pipe surface and the interior of the fitting surface should be free from dust, moisture, and oil. Clean them using a lint-free, clean cloth to remove dust, oil, or moisture. The presence of any contaminants will interfere with the bonding capacity of the solvent cement, resulting in leaks or failure under pressure.
For dirty surfaces, you could use a CPVC-compatible cleaner. But for petroleum-based products or harsh chemicals, do not use them since they may damage the pipe material.
Step 6: Using Solvent Cement
This is one of the most essential steps in installation. Only Dulet-approved CPVC solvent cement should be used, as it has been specially designed to chemically bond CPVC materials.
Apply a thin, even coat of cement to the exterior surface of the pipe and a slightly thicker coat to the fitting’s interior surface using a proper applicator (typically a brush). Always make a single, smooth-stroke application of cement — do not over-apply or apply dried cement. Avoid contact with cement on unwanted surfaces or hands, and provide ventilation if working in an enclosed space.
Keep in mind that the cement must remain damp when assembling, so don’t wait until it’s dried.
Step 7: Assembly of the Joint
Right after the application of solvent cement, slide the pipe into the fitting socket with a small twisting action (about a ¼ turn) to distribute the cement evenly around the joint. Force the pipe in until it strikes the socket bottom (shoulder).
Leave the joint held for around 30 seconds to lock the pipe so it will not push back out. Ooze-out cement that has occurred may be removed by wiping it clean with a piece of clean cloth. Avoid touching or turning the joint once placed, however, as any shifting will loosen the bond.
Step 8: Curing Time and Setting Time
After it is assembled, let the joints set correctly. The setting time varies depending on ambient temperature, pipe size, and the working pressure. At the normal room temperature (approximately 23–25°C), provide at least 15 minutes of setting time before transferring or handling the assembly.
For pressurized systems, a 24-hour full curing period is advised before testing or applying the pipeline. If it’s cold (below 10°C), increase curing accordingly. Never push pressure into a system before it is fully cured — this is a major cause of premature joint failure.
Step 9: Support and Alignment
Careful support is needed to preserve the integrity of the CPVC pipe. Employ suitable plastic or coated metal clamps and brackets to support the pipe. Spacing among supports will vary depending on pipe size and orientation.
Normal horizontal support spacing:
½” to 1″: every 3 feet
1½” to 2″: every 4 feet
Vertical pipes must be braced at each floor level or spaced 6 feet apart. Don’t use tight clamps that will distort the pipe, and never hang heavy objects from the pipe.
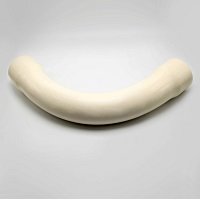
Pipes must also be aligned to reduce stress don’t bend or twist the pipe unnecessarily. Use elbows and offsets where directional changes are necessary.
Step 10: Pressure Testing
Once the system is fully cured, conduct a hydrostatic pressure test to verify no leaks or porous joints exist. Use fresh water and pressure up the system progressively to the desired testing pressure — typically 1.5 times the working pressure. Watch the system for a minimum of 2 hours. In the event of any pressure drop, check all joints, fittings, and connections thoroughly.
On leakage, replace the damaged part — never try to repair a defective joint by adding more cement after curing. Do not use air pressure testing unless unavoidable, since CPVC is intended for water systems. Air tests are hazardous because of the compressibility and stored energy of air.
Step 11: Insulation and Protection
If your CPVC pipes are subjected to sunlight or the outdoors, apply UV-resistant paint or insulate. Direct UV exposure can weaken the outer pipe material. Insulate CPVC pipes in cold weather to conserve heat and avoid freezing. Where pipes go through walls or slabs, use sleeves to cover them to shield them from expansion stress. Don’t embed solvent-welded joints in concrete — use mechanical couplers or provide access for inspection.