Step 1: Plan Your Piping Layout
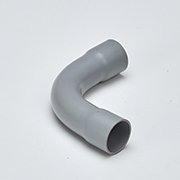
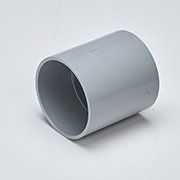
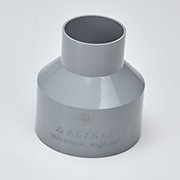
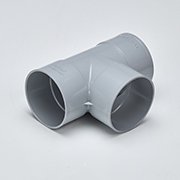
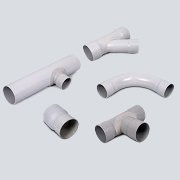
Before initiating the installation, it is important to design the overall piping configuration. Determine where water inlets and outlets will be located, along with any equipment like pumps or tanks. Take particular care in making use of fittings like elbows, tees, and couplings to provide a smooth flow of water.
This will reduce the number of unnecessary joints and bends. Also, be sure to follow space limitations, building codes, and pressure ratings. A good plan guarantees smooth installation and the best performance of your agriculture PVC pipe system.
Step 2: Cut the Pipe
When the layout is complete, cut and measure the agri pipes or agro pipe to the specified lengths. Clean and straight cuts should be made using a pipe cutter or a fine-toothed saw at a 90° angle. Don’t make angled or rough cuts since they can lead to faulty joint fitting and leaking.
Make sure the pipe is supported while cutting so that it doesn’t crack. Wear protective gloves and goggles at all times while working with cutting tools. Proper cuts will reduce wastage and result in an easier installation process.
Step 3: Deburr and Chamfer the Pipe
Once cut, there will be sharp edges on the pipe. Remove these burrs from the inside and outside of the pipe using a deburring tool, utility knife, or sandpaper. Also, chamfer the ends of the pipe by beveling them at an angle of 10–15°.
Chamfering allows easier insertion of the pipe into the fitting and produces a smoother, leak-free joint when solvent cement is used.
Step 4: Dry Fit the Components
Prior to applying adhesive, dry-fit the fittings and pipes together first. This helps you ensure the pipe will fit into the fitting and all directions and angles are good. It’s also a time to double-check the measurement.
Mark the pipe and the fitting for correct alignment when you finally assemble. Dry fitting confirms the system will work in conjunction with each other before final assembly.
Step 5: Sanitize Pipe and Fitting Surface
Both the exterior surface of the outer pipe and the fitting’s interior should be free from dust, oil, or moisture. Wipe both surfaces using a lint-free cloth. For areas that are highly contaminated, a CPVC-compatible cleaner can be used, but petroleum-based cleaners should be avoided since they harm the agriculture PVC pipe material. Cleaning properly will allow the adhesive to bond appropriately, avoiding joint failure or leakage.
Step 6: Apply Solvent Cement
Use only Dulet-approved CPVC solvent cement for optimum results. Apply a thin, uniform layer of cement to the outside of the pipe and a little heavier coat to the inside of the fitting. Ensure that cement is applied in one smooth, uninterrupted stroke—do not apply too much.
Immediately after applying cement, the pipe and fitting have to be connected before the cement hardens. Provide good ventilation when using solvent cement.
Step 7: Joining the Joint
Once the cement is applied, then insert the pipe into the fitting as quickly as possible. Twist the pipe around a little bit (a ¼ turn) to spread out the cement onto the joint evenly. Insert the pipe fully into the fitting so that it meets the bottom.
Hold the joint for 30 seconds so the cement can harden and won’t cause the pipe to shift out of the fitting. Remove any excess cement with a cloth but do not move the joint once set, as this will reduce the bond strength.
Step 8: Cure Time and Set Time
Once the joint has been assembled, let it properly cure. Cure time is contingent upon ambient temperature, pipe size, and system pressure. When using normal room temperature (approx. 23–25°C), allow the system to set for a minimum of 15 minutes before processing.
For pressured systems, best practice is waiting 24 hours for complete cure before test or use on the pipeline. Cold temperatures take longer to cure. Never stress the system until it is completely cured in order to prevent early joint failure.
Step 9: Support and Alignment
Appropriate support is necessary to maintain the stability and longevity of your agricultural pipe system. Use plastic or coated metal clamps to hold the pipes in place. The supports will be spaced out differently depending on the pipe diameter and direction. Horizontal pipes have supports spaced out every 3–4 feet, and vertical pipes need supports every 6 feet.
Do not use constrictive clamps that may warp the pipe, and do not suspend heavy loads from the pipes. Alignment minimizes stress to the system and allows water to flow smoothly.
Step 10: Pressure Testing
After the system has cured completely, conduct a hydrostatic pressure test to confirm there are no leaks. Fill fresh water and gradually pressurize the system to 1.5 times its operating pressure. Watch over the system for a minimum of two hours.
In case you detect a pressure drop, check all the joints, fittings, and connections for any leaks. Replace the faulty parts if you identify any. Do not use air pressure testing because CPVC pipes are created for water systems, and air tests are dangerous.
Step 11: Insulation and Protection
If the agricultural PVC pipes get exposed to sunshine or external weather conditions, apply UV-resistant coatings or insulations to cover them from UV destruction. Insulate the pipes against freezing for winter conditions.
Place sleeves over pipes when the pipes go through slabs or walls to cover them from expansion pressure. Never embed solvent-welded joints inside concrete; make use of mechanical couplers or provide openings for inspection instead.